How To Safely Secure Steel Road Plates
When it comes to roadworks and construction projects, steel road plates are essential to ensuring vehicles and pedestrians can pass safely over holes, trenches, and excavations. Here at RPM Hire, we offer our customers a range of heavy-duty options designed to ensure your site remains accessible.
In this latest blog, we thought we would take a closer look at how to secure steel road plates to ensure that they are keeping workers and members of the public safe.
What are steel road plates and what are the benefits?
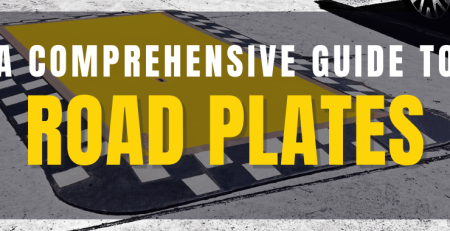
Before we take a look at how to secure steel road plates, we thought we would first take a quick look at what they are and some of the benefits that they bring. The plates that we provide at RPM Hire are made from 25mm thick carbon steel, ensuring that they are able to withstand heavy use from vehicles and footfall. To maximise security, our steel road plates are finished in a highly visible yellow colour and coated with non-slip Dulux Duremax. We also provide the FLEYG ramp to eliminate noise and improve safety.
Steel road plates are able to provide a wide range of benefits to your work site, including:
- Safety
The biggest benefit of steel road plate installation is that it maximises the safety of your site. Roadworks and construction projects often require excavations, and these plates will safely cover them so that vehicles and pedestrians can safely cross them. - Versatile
Steel road plates are available in a wide range of sizes and thickness, ensuring that they are highly versatile and can be used across a range of different environments. - Easy to install
Not only are they highly versatile, but steel road plates are also very quick and easy to install, reducing downtime and ensuring your project remains on schedule. - Cost-effective
Finally, these plates are also a very cost-effective solution for covering trenches, particularly when compared to alternatives such as concrete.
How to secure steel road plates
Now you know what they are and the benefits that they can provide, how do you safely and securely install them?

Step One: Risk Assessment
Before installation can begin, you need to first carry out a thorough risk assessment. This process should ensure you cover every possible hazard that you might face, including the kind of traffic that you will face, the weight of the vehicles, and the frequency of traffic.
Step Two: Choose your plate
Once you have completed your risk assessment, the next step is to choose the right steel road plate for your project. There are a wide range of sizes and weights available, so make sure that you are selecting one that is suitable for the kind of traffic that you will be facing. The heavier the vehicles, the stronger the plate you will need.
Equally, if you are expecting to have pedestrians crossing over your excavation, then it is essential that you choose a plate that features a non-slip surface.
Step Three: Ground prep
The next step is to prepare the ground on which the plate will be placed. You need to ensure that the plate has strong and stable base underneath it, with plenty of space between the hole and the edge of the plate. You should also clear away any debris so that the ground is completely level.
Step Four: Lift correctly
Steel road plates can be incredibly heavy, so you need to make sure that you are lifting them correctly. To ensure safety, the steel road plates that we offer at RPM Hire feature a centre lifting point with an integrated Ranger Lock-N-Lift lifting hook, allowing you to easily manoeuvre the plate into position. When installing yours, make sure that other workers are clear from the area, as the weight can cause swinging while elevated.
Step Five: Accurate alignment
When positioning your plate, carefully align it so that it is completely covering the excavation and there are no gaps or hazards surrounding the area. If your steel plate features a large elevation from the ground, then make sure that you add a Fleyg ramp. This not only helps to eliminate noise from traffic passing over but it also increases safety by removing the trip hazard.
Step Six: Fasten in place
Once correctly aligned, the final step of steel road plate installation is to fasten it in place. Our road plates come with four prefabricated corner holes designed for deck pins or road spikes. Pinning is the most common and easiest method of fastening your plate; however, you can also fasten it via recessing to create a flush surface, although this can be a costly and time-consuming task.
Step Seven: Add signage
To maximise the safety of your worksite, you need to ensure that you have the correct signage in place. This includes making other road users and pedestrians aware of the upcoming ramp as well as redirecting any traffic.
Step Eight: Regular checks
Regular checks are essential to ensure that your road plate remains working as designed. While incredibly strong, regular use can lead to stress wear or movement, so inspections will allow you to address any issues or reposition.
Looking for steel road plates for your project?
If you are undertaking roadworks or a construction project and are in need of steel road plates, then RPM Hire is here to help you. Our highly experienced team can help advise you on the size and solution that is best for your project, ensuring you are maximising safety.
We pride ourselves on delivering the highest quality products and outstanding customer service, with our team working closely with you to keep your project on time and on budget. Want to find out more about our extensive array of products? Get in touch today!
